In this quick and short guide we are going to cover how to properly rebuild user profile in Windows 7. It is not very hard and we will want to make a backup just in case so that we do not lose any data.
Sometimes applications can start acting weird or stop working altogether and a reload of the OS is not always necessary to fix this issue. If you are able to log into another account on your PC and run the application with no issues, you most likely have something corrupt inside of your profile. Here are the steps I take to rebuild a user profile in Windows 7.
How To Rebuild User Profile In Windows 7
Step #1 - You Need A Local Administrator Account
The first thing you will want to do is make sure that you have a local administrator account that you can work in to make the necessary changes on the OS. So you will either need to create one or use one that is already there. Also, make sure that you know the password for the account or reset it if you do not know it.
***Just remember that you cannot use the account that you are trying to fix as the admin account.***
Step #2 - Find User Account Name & Reboot!
Now that you have a local administrator account ready, you will need to find the user profile folder name that is having the issues. You need to locate this information as you will be working on this folder in the next step, after that is done you will need to reboot your PC. (You might want to print out this article or reference this article on your phone or tablet if you are working on the PC that you are reading this on)
The easiest way to locate the folder that the user profile resides in is to run one command.
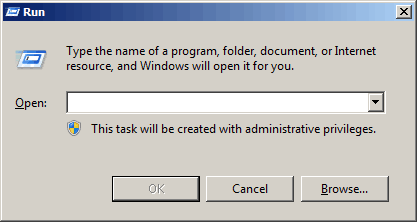
On your keyboard, press Windows Logo + R
That should launch the run box. (See image below)

Now type in cmd and click OK
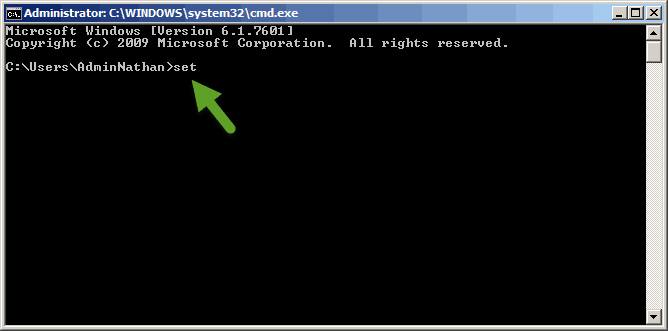
The command line interface will show up.
Now type in “set” (see image below) and hit enter on your keyboard

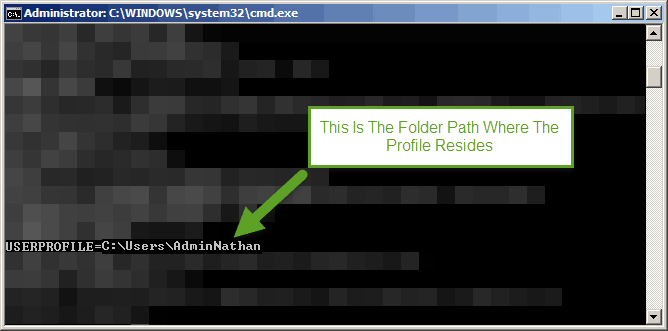
You will see a bunch of text show up.
The only line that we are interested in is USERPROFILE=
That line tells us exactly where the corrupted or issue afflicted user profile is located.
Make a note of that path as we will need it in the next step.

Now issue a reboot command to your PC.
Once your PC reboots, you will want to log in using the local administrator account that you setup in Step 1.
Step #3 - Backup Data
So at this point you should be logged in as the local administrator. You will want to navigate over to the user folder that you found by doing Step 2.
You will want to rename the profile folder to something other than what it currently is. I tend to just add .old to the end of the profile folder’s name. So from my example the profile folder located at C:\Users\AdminNathan would be renamed from AdminNathan to AdminNathan.old
This way the PC will not try to access it when recreating the profile. As as an added measure you can backup this folder as it holds all of the application and profile data that might be needed later on. I would rather have a backup over nothing.
Step #4 - Registry Change Required
In order to avoid having a temporary profile issue, you will need to make a change to the registry.
*** Please use the utmost care when performing this procedure. Changing settings in the Registry Editor can cause serious PC issues. So proceed at your own risk. ***
The step we are about to do is to remove the profile from the Profile List in the registry. That way when you go to log back in, it will create a new profile from scratch without any errors.
To begin, press Windows logo + R on your keyboard.

Now type in regedit
You will then see the Registry Editor.

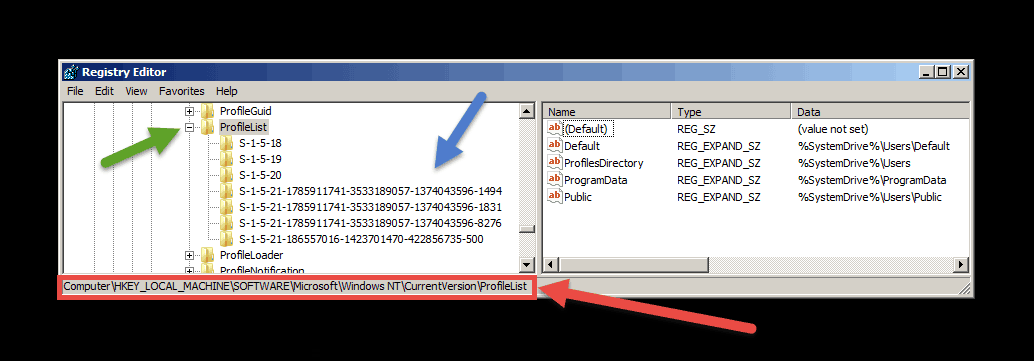
It should look similar to this image below.

The red arrow points to the path that you are inside of in the registry. That path should match the path given above.
The green arrow is to let you know that you will need to expand the ProfileList folder.
Lastly, the blue arrow is to show you that the folder listed under the ProfileList folder are the profiles that are installed on the computer.
Next you will need to click on each folder and look at the string value with the name: ProfileImagePath
You are looking for the match to the profile path you found when doing Step 2.
In my example, I am looking for C:\Users\AdminNathan
Once you have found the matching path, right click on the folder and rename it or delete. (See image below)
If renaming, add .old at the end. That way if you need to revert back you can do so by removing the .old from the names.

Step #5 - Reboot For New Profile
Now once you reboot your PC, login with your formerly messed up user account. That will cause a brand new profile will be created.
The only remaining step is to copy your data back from the messed up profile over to your new profile.
If you found this helpful, please take a second to share it on social media, vote below, and let us know that you liked our post! Thanks for visiting!


Recent Comments