Many times managers need to add or remove people from certain distribution groups as roles and responsibilities change. Yet, many don’t know that they can do it themselves if they own the distribution group. Here is how to you can modify a distribution group using Outlook following these 3 easy steps.
Step 1 – Locate The Address Book
On the home ribbon in Outlook, find and open the address book.

Step 2 – Find The Distribution Group You Want To Modify
In the address book, use the search function to locate the group that needs to be modified.

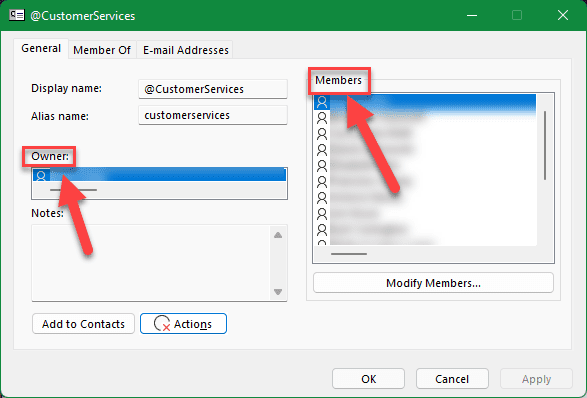
Now, double click the group that needs to be modified. This will open the distribution group properties window
Step 3 – Modifying The Distribution Group
The right side of this window shows the current members of the group. If you are the owner of the group, you can modify the members from here. If you are not the owner, you will need to contact the owner. The owner is identified on the left side of this window.

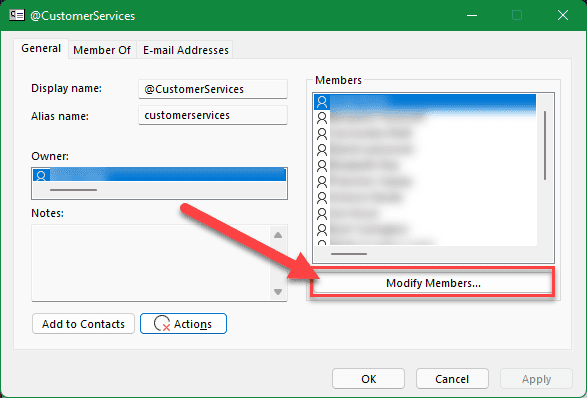
If you are the owner and need to add a member to the distribution group, click “Modify Members…”

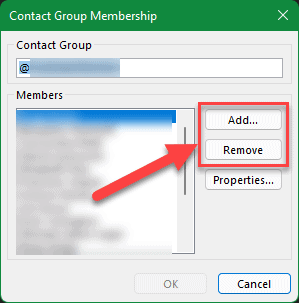
This will bring up the Contact Group Membership window.
From here you can add and remove members from the distribution group.

To add a member, click “Add.”
This will bring up the Add Users window.
This window is simply an address book search.
Use the search function to locate the user you would like to add.
Once found, double click the name or click the “Add” button on the bottom left to add the name to the field at the bottom of the window.
Next, click “OK” and the selected person will be added to the group.
From that point, click “OK” until all windows are closed.
To remove a user from a group, select remove at the contact group membership window.
Then select the user that needs to be removed in the list and click “Remove”
Click “OK” until all windows are closed.


Recent Comments